Thursday, December 29, 2016

Whimsy 8 x 8 album with lots of flaps.

I wanted to make an 8 x 8 album from scratch. I found a You Tube video from Tmika at scrapdaworld showing her make a 8 x 8 album. I loved how her design had a lot of flaps. I made my book from her video. The book has 4 inside pages. All the pages are covered using the Whimsy paper collection. It took all 24 sheets for the album. All four pages have tags that extend to the right that than can be used for photos and journaling.

Here is the cover. The flowers and leaves are from the  CTMH Flower Market Cartridge

This is the inside cover and first page. There is flap on the right hand page that flips down. 

Here is the first page with the flap open showing the pocket inside with a brown tag in it.

This is the back of page 1 and the front of page 2. The back of page 1 flips open and the right is a gate fold flap.

Here are the flaps open. The back of page 1 reveals two side pockets.

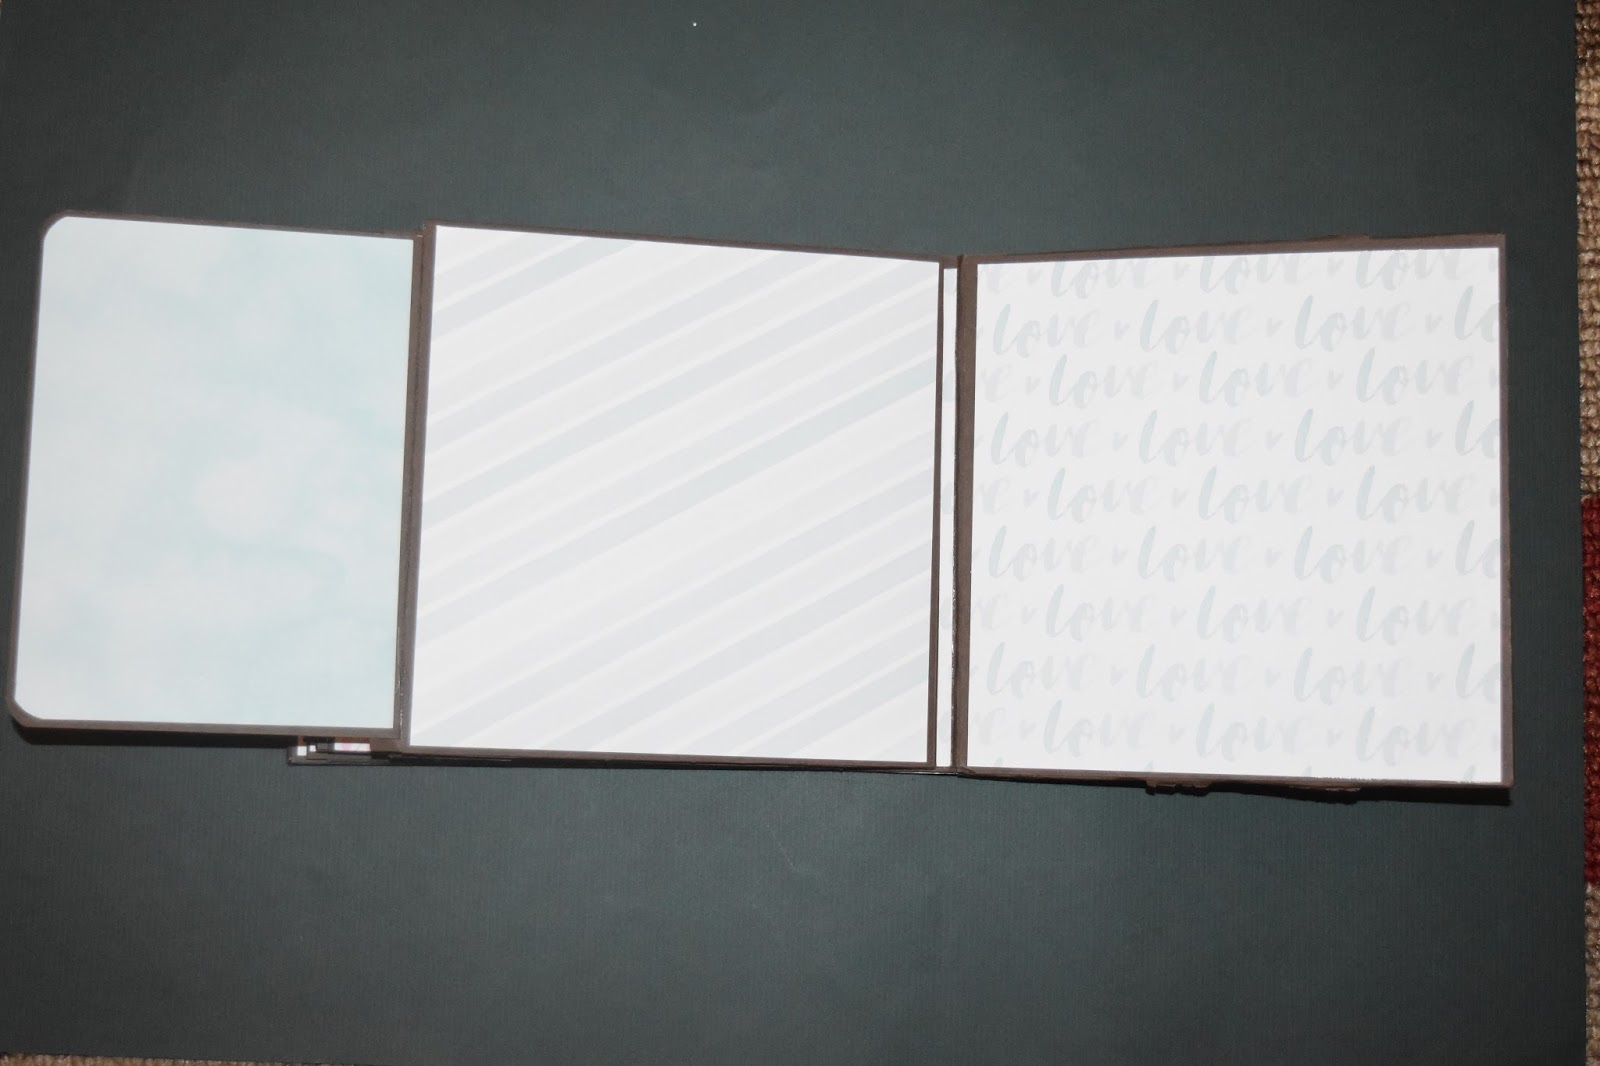
This is the back of page 2 and the from of page 3. Page 2 has two flaps that open to reveal 3 more smaller flaps. Page 3 has three large flaps.  


Here is page 2 with the flaps open showing the 3 smaller flaps ready from 4 x 6 photos.

 Here is page 3 with the three large flaps open. Two open to the left and one to the right.

This is the back of page 3 and front of page 4. Page 3 has a water fall of 3 - 4 x 6  flaps. Page 4 have a pocket and tag brown tag.

This is the back of page 4 and the inside back cover.

Here the flap on page 4 is shown open.

Here is the back cover.
Using the Whimsy collection for the album made covering it easy. All the pages in the collection coordinate. Thye are lovely pastels that make the album suitable for  any use. 


Wednesday, December 14, 2016

Spritzed Lovely Leaves-A1195

I like the spritz acrylic block technique. I used it on these lovely leaves. I used 3 re-inker colors; Blossom , Crystal Blue and Tangerine. Using a 3 x 3 acrylic block I patted on the 3 ink colored from the ink pad. I tried not to over lap the colors so I would not contaminate the ink pads. I then took one of the Close to My Heart spray pens - Z1380  and filled it with water. I spritzed water on the acrylic block with the ink on it. You want to cover the block but not make it so wet the water runs. Now use the inked and spritzed block and stamp it on the paper. Make sure to press down on the block and watch the water and ink spread out onto the paper.  It may take a couple of tries to get the look you want. Do not give up. Let the paper dry and then ink up your stamp and stamp the design over the spritzed paper. I my example below the lower left corner did not get fully covered with ink , but I like the way it looks a little rough with the other areas looking smooth. 

Here is the assembled card with the spritzed paper.
Spray Pen - Z1380

Lovely Leaves - A1195


Monday, November 21, 2016

Yuletide Joy stamp of the month set S1610

I have a friend, Laura Papicak, who with friends at her church, Our Savior Lutheran Church make cards each month for the parishioners who can not attend church.  She inspired me to do the same for the parishioners of my church, St Paul Lutheran Church.  Below are 30 cards for the church to send to parishioners who can not attend church. I made them using the Yuletide Joy stamp of the month set S1610 and the Merry Christmas stamp M1148. I hope the cards bring joy to the people who receive them and let them know that the church members remember them. 


I used cranberry and white card stock and cranberry ink. The stars are heat embossed with Recollections tinsel ruby embossing power and VersaMark Ink. It really makes the stars sparkle. 


Yuletide Joy stamp of the month set S1610 

Merry Christmas stamp set M1148

VersaMark ink pad Z891

Wednesday, November 16, 2016

Forest Feast A1197 Stamp Set

I just sent out my Thanksgiving cards, I am a little late. I could not resist this cute squirrels in the Forest Feast stamp set A1197.  The make a cute Thanksgiving card hoping my family would enjoy them. I hope you and your family have an enjoyable Thanksgiving.


I used paper from the Swan Lake paper packet and Peacock card stock along with Goldrush ink. The buttons and ribbon help to bring the card together.

 I colored the images with Pastel Peach, Clay, Bronze and Warn Gray markers.

Forest Feast stamp set A1197

Swan Lake paper packet X7212B


Saturday, October 22, 2016

CTMH True Love

What better sentiment for a card maker then the one in the CTMH True Love stamp set - "This is a PAPER HUG". I make a lot of cards and hope that the receiver of them receives them with love and joy, this saying expressed that wish. I love the stamp set with the cute boy with a balloon and the girl with the heart. The boy and girl make a nice stamp to color as I did below . It is very versatile.
The card was made using the MOJO Monday 470 sketch challenge and the CTMH  Swan Lake paper  for the Between the Fold 32B challenge. and Color Dare #216 challenge  I think the combination make a lovely card.

The color I used for the gitl

True love Stamp Set D1711


Tuesday, October 18, 2016

Party Time Workshops Your Way stamp set

I wanted to make a masculine birthday card using the Sketch # 128 from Atlantic Hearts Sketch Challenge  and the Heart 2 Heart  Challenge for wood paper. I thought that the usage of Close to My Heart wood and craft paper created a masculine feel . The edge is masculine too with the Martha Stewart notched square edge punch.  The ribbon is the black and gold ribbon from Close to My Heart.


Party Time Workshop Kit


The kit is an easy way to create cards as it comes with paper and stamps enough to create 10 cards.


Tuesday, October 11, 2016

Workshop Your Way - Happy Holidays Cardmaking Kit


Do you want 10 Christmas cards in a hurry? This is it then. The Workshop Your Way - Happy Holidays Card Making Kit and 2 inks (Willow and Cranberry)  with acrylic blocks for the stamps are all you need. It makes an easy project to make at a crop or in your home. If you need more cards all you need is more patterned card stock. Below are the 2 types of cards I make using the card kit. The cards are easy to make with a clean, fresh feel to them. When you buy the kit, there is a download guide you can download that shows how to cut the paper and make the cards.

 I added clear jems to the stars for extra sparkle.


I added red jems to the berries for extra sparkle.


Workshop Your Way - Happy Holidays Card Making Kit
You Get: 
1 – exclusive workshop stamp set (B-size)

1 – sheet City Sidewalks B&T Duos™

2 – cardstock sheets (1 Cranberry, 1 Willow)
1 – gold shimmer trim (Z1985)
10 – white card bases and envelopes


Cranberry Ink
Willow Ink


Thursday, October 6, 2016

Stamping with ink pads.

I thought I would share some thoughts on acrylic blocks and ink pads. It is always good to share knowledge.

Stamping and Ink pads
  • You need a verity of acrylic block sizes to accommodate your stamps. Choose an acrylic block for your stamp that is no more than an inch or so larger than the stamp.  If the block is too large there is more of a chance that you will get ink on the acrylic box and on the paper where you do not want it.
  • When placing a polymer or rubber stamp on an acrylic block, line up the image with a flat edge. This is especially helpful with word stamps. If the word is lined up with the edge straight across, you can then use the top edge of the block to make sure you are stamping a straight image.
  • To stamp an image, you need to ink the stamp with an up and down motion. Do not rub the pad across the stamp, as that will cause ink to collect in the crevices and cause smudged images.
  • If the stamp has never been used before, it is a good habit to ink it up once or twice and test stamp it. This will remove any chemicals used in the stamp making process. Do not sand the stamp surface. Sanding the stamp surface will erode the stamp image.
  • When you stamp the image, make sure you place the stamp directly up and down on the paper. Do not rock the stamp side to side or you will get a smudged image. Let the stamp set on the paper for a count of 10. This will let the ink soak into the paper. Press evenly on all areas of the stamp. This is especially important on large stamps to make sure all areas of the stamp touch the paper. Lift the stamp straight up when done.
  • A stamp mat is a good investment. It helps make sure that the stamp touches all areas of the paper particularly on a table that is not smooth, such as a metal table. If a mat is not available, a magazine or a couple of layers of paper may help.
  • If the stamp is large, it is sometimes easer to bring the ink pad to the stamp by turning the stamp face up and turn the stamp pad over to cover the stamp image.  Make sure to cover the stamp image completely with ink. Inking the stamp face up helps to make sure the stamp is completely covered with ink as you can see what area is being inked.
  • If the stamp seems to stick to the paper, you need to re-ink the stamp pad. To re-ink the stamp pad, gently squeeze the re-inker over the pad and let it soak in. You can use an old credit card to spread the ink around on the pad. Do not over ink the pad. If it is over inked, you will get too much ink on the stamp and get a smudged image.
  • If the image is light no matter how well you ink it, the pad needs to be re-inked. See above for re-inking.
  • If you use the same stamp to stamp multiple ink colors, make sure to clean the stamp between the ink colors or it will stain the ink pad and you will have a mixed color image.
  • Clean your stamps after stamping with them. Close to my heart has an all-purpose stamp cleaner.  StazOn is likely to stain stamps. Use the special StazOn cleaner to clean the stamp before the ink dies on it. Using a stamp scrubber will help to clean the stamps.

There are both regular medium size and mini ink pads.
  • The mini ink pads are cheaper. You can therefore afford to buy more. They usually require you to pick up the ink pad and pat it on the stamp. The Close to my Heart mini pads are pigment ink and sold in sets. If you want to try different colors, the mini pigment ink pads are great. They give you many colors for less money.
  • The regular sized ink pads from Close to my Heart are larger dye ink pads and are more expensive. The regular sized ink pads have re-inkers, which means you can re-ink them for a fraction of the price of a new ink pad. If you do a lot of stamping the regular dye ink pads will last longer with the re-inkers. If you have the re-inker it also means you will not run out of ink in the middle of a stamp session. I suggest that every time you buy a stamp pad you buy the re-inker.

                               There are 9 major types of ink pads:
                            1. Dye Ink – Dye based ink pads are water based and good for most papers. Since it is not waterproof it should not be used with water coloring. It dries quickly and is translucent. If you stamp one color over another the base color will show through. Be careful not to stamp 2 colors across from one another on the color wheel as you will make the color brown. Dye ink can fade in bright light. Store dye ink pads upside so the ink rests on the surface.
                            2. Distress Ink- Distress inks are a dye based ink. It has special properties to keep the ink wet longer and blend. Distress ink is made to blend and spread when water is added.
                            3. Pigment ink – Pigment ink is thicker then dye ink and takes longer to dry. It is an opaque ink. If you stamp one color over another the bottom ink will show through less then with dye based inks and not blend to make another color. Close to My Heart White Daisy and Colonel White pads are pigment inks.  Pigment inks can be used to heat emboss as they take longer to dry. Setting pigment inks with heat is a good idea. Pigment ink does not soak into paper as dye ink does, but stays on top. Pigment ink is fade resistant.
                            4. Chalk ink – Chalk ink are pigment type inks that dry to a matte finish.
                            5. Embossing Ink – Embossing ink is a colorless ink similar to pigment ink. It is sometimes tinted pink but dries clear. It is used to stamp an image before heat-embossing. You can also find embossing pens, which make it easy to correct missed embossing details.
                            6. Memento™ - Memento ink is a pigment based ink that works especially well with alcohol markers such as ShinHan Touch Twin and Copic. Once dry it will not smudge when you use alcohol markers to color images stamped with it.
                            7. VersaMark - VersaMark is a pigment based clear ink pad.  It can be used for watermarking and stamping subtle tone-on-tone images on cardstock. The ink also acts as a “glue” for chalks and pigment powders. It is acid free.
                            8. StazOn® - StazOn is an alcohol bases ink. It can be used on paper as well as any non-porous surface, like metal, plastic, glossy paper, transparencies, leather, glass and ceramic. This is an acid-free, archival, fast-drying solvent ink. It should be used to stamp images that you want to water color as it will not smudge with water after it is dry.  It will stain your stamps. There is a stamp cleaner just for StazOn.


                            Friday, September 16, 2016

                            Craft Day


                            Come to the crafting day and make a free card. Here are some of the cards to select from

                            This card was made from paper from the Jeepers Creepers paper pack I had left from the Scrapbook pages I made below  and the Monstrous-Halloween stamp set C1652 also used on the scrapbook page.


                            These cards are made from the Workshop Your Way Think of You Card Making Kit G1117. When buying the kit you can also download the instructions to male 10 cards from the kit. The kit includes:

                            1 – exclusive workshop stamp set (B-size)
                            3 – sheets Oh Deer! B&T Duos™
                            2 – cardstock sheets (1 Raspberry, 1 White Daisy)
                            1 – bitty sparkles (Z1263)
                            10 – white card bases and envelopes


                            Crafting Day September 24

                            Come to the crafting day and make a free card. Here are some of the cards to select from

                            This card was made from paper from the Jeepers Creepers paper pack I had left from the Scrapbook pages I made below  and the Monstrous-Halloween stamp set C1652 also used on the scrapbook page.


                            These cards are made from the Workshop Your Way Think of You Card Making Kit G1117. When buying the kit you can also download the instructions to male 10 cards from the kit. The kit includes:

                            1 – exclusive workshop stamp set (B-size)
                            3 – sheets Oh Deer! B&T Duos™
                            2 – cardstock sheets (1 Raspberry, 1 White Daisy)
                            1 – bitty sparkles (Z1263)
                            10 – white card bases and envelopes


                            Wednesday, September 14, 2016

                            October Card Buffet


                            Come and join Sue Palmer Stoughton, Janet Kurtz and myself at 880 Applegate Avenue in West Chicago, IL on Sunday October 9 at 1 PM - 5 PM. 
                            Come join us for a card buffet. Make 12 cards and three Holiday tags for only $20. You will move from table to table and make a fun group of cards including Birthday, Thanksgiving, Halloween, Chrismas and more. Come any time, grab a seat and get creative. The only experience you needs is having fun!

                            Monday, September 5, 2016

                            Crafting Day


                            Saturday, September 24, 2016, 9:00 AM to 9:00 PM
                            St Paul Lutheran Church, Cafeteria, 1025 W Lake St, Melrose Park, IL 60160
                            Cost: $40.00 /per person

                            Join us for a FULL DAY of scrapbooking, card making, and crafting.
                            The cost covers half of a 5 foot round table of your own, beverages for the day, snacks, lunch, Dinner and space rental.

                            It is a day full of FUN with FRIENDS!!
                            Come and make a card for Halloween or Thanksgiving for free and check out what’s going on, you can make more for a nominal fee.
                            Go to the meet up group below for more details.

                            http://www.meetup.com/Marvelous-Paper-Scrapbooking-Cards-Meetup/

                            or email  Jean Williams   jean1106@att.net.

                            Create kindness Card Kit


                            Celebrate National Stamping Month this month with a unique card kit. It includes a storage box, 24 mini cards , 8 stamps , and acrylic bock and  ink. I created some of the mini cards, but I also decided to cut apart some of the cards that where provided and use them and the provided circles to create 4 1/4 x 5 1/2 greeting cards. Below are a sampling of the cards I created. 
                            The kit would make a wonderful for any stamper.


                             The Create Kindness card kit (CC1145) includes 24 pre-printed card bases with envelopes, 8 exclusive M-size stamp sets, a 2″ × 2″ My Acrylix® block, and an Archival Black mini pigment ink pad, all packed snugly in the My Acrylix® Mini Stamp Organizer.

                            Wednesday, August 31, 2016

                            Jeepers Creepers paper pack


                            I created my first scrapbook pages using the new Jeepers Creepers paper pack. The Cricut cutouts are from the CTMH Artbooking cartridge. The left hand page uses 2 - 6 x 12 flip flaps that open to reveal 5 pictures and with the flip flaps closed the right hand page continues the theme with more Halloween pictures. I used the Monstrous-Halloween stamp set C1652 to accent the pages. I love the stamps. I think they can be user to make birthday cards and match up well with the paper. The paper can be used with the stamps to make birthday cards also. That versatility make the paper and stamps a wonderful buy.


                            Here are the 2 scrapbook pages with the flip flaps closed.


                            Here is the left side page with both flip flaps open.


                            Here is the left side page and the left flip flap open.

                            Here is the left side page and the left flip flap open.


                            Here is the left side page and the left flip flap open.


                            This is the Jeeper Creepers paper pack.

                            The Monstrous-Halloween stamp set C1652


                            Tuesday, August 23, 2016

                            Enjoy the ride stamp set

                            What a wonderful set of stamps. There is a boy and girl bicycle and accompanying sayings. It is a nice set to made cards for any occasion. What boy or girl wouldn't love a card with these bicycles on them. The accompanying sayings can go on that note card to that adventurous person in our life,


                            Here is the boy bicycle with the 'I wheelie like you' saying on it. The card was colored with ShinHan Touch Twin  colors:  Tangerine, Sweet leaf and Emerald. The papers are tangerine to match the colors used.


                            On this girl bicycle I stamped the flower basket, colored it, cut it out and added it to the bicycle rack. The card was colored with ShinHan Touch Twin  colors: Tangerine, Cranberry, Sweet leaf and Emerald. The  card was made with Charlotte paper.

                            Enjo the ride stamp set - B1525